
|
 |
 |
 |
 |
 |
 |
 |
 |
 01-17-2010, 10:31 PM
|
#1 |
|
restorer of the original

Join Date: Mar 2008
Location: Zionsville,PA
Moto: '93 ZR1100 &'73 Kawasaki H1 500
Posts: 1,331
|
Here's step by step instruction ( with pics ) on how to load center fire ammo. I'm doing .223 target ammo for my Bushmaster AR-15 so there are a few extra steps for precision ammo but the same steps can be done for your hunting rifle. The press is a single stage RCBC Rock Chucker, part of the Master Kit I got about 17 years ago.
No cliffs, details are too important to skim over. Also, safety glasses would be good to wear at all times. Click the pictures for large view.  Here we have once fired .223 brass , a set of dial vernier calipers , primer pocket brushes ( green handles), a primer pocket reamer (black caps on ends), a flash hole deburring tool ( wooden handle ), a reloading manual and in the three green boxes are a set of dies for the .223, a universal decapping die and a set of precision mics ( for measuring overall length of the assembled ammo ) 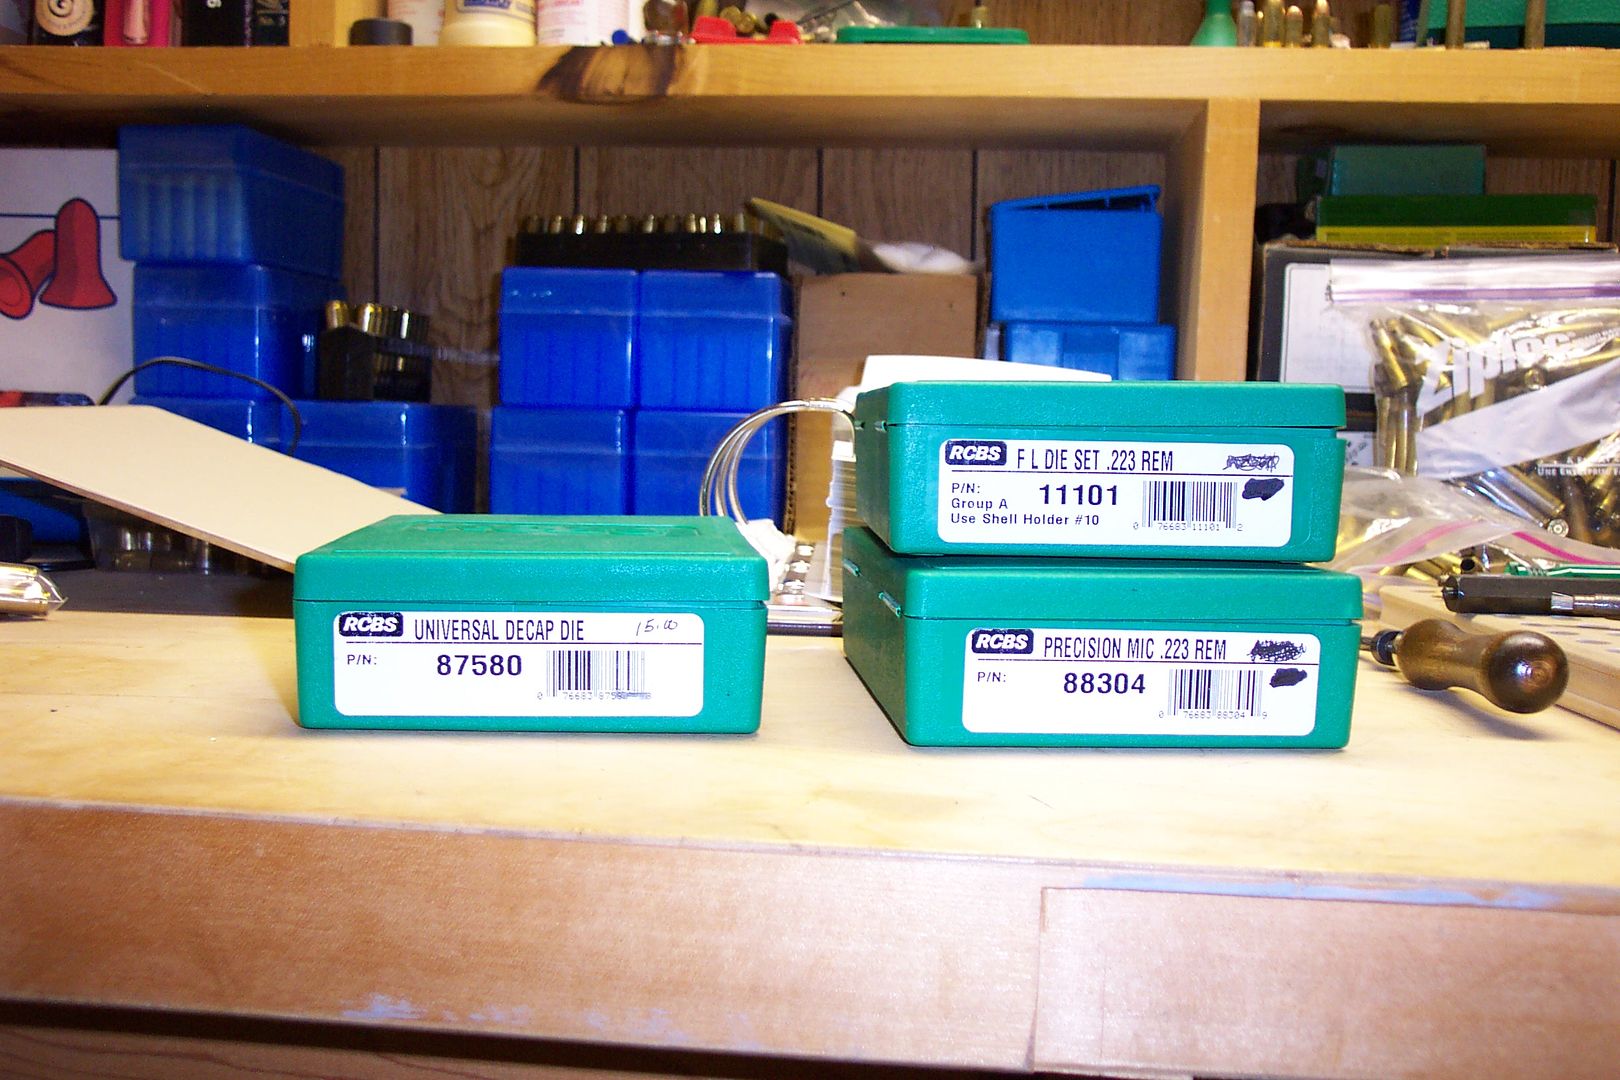 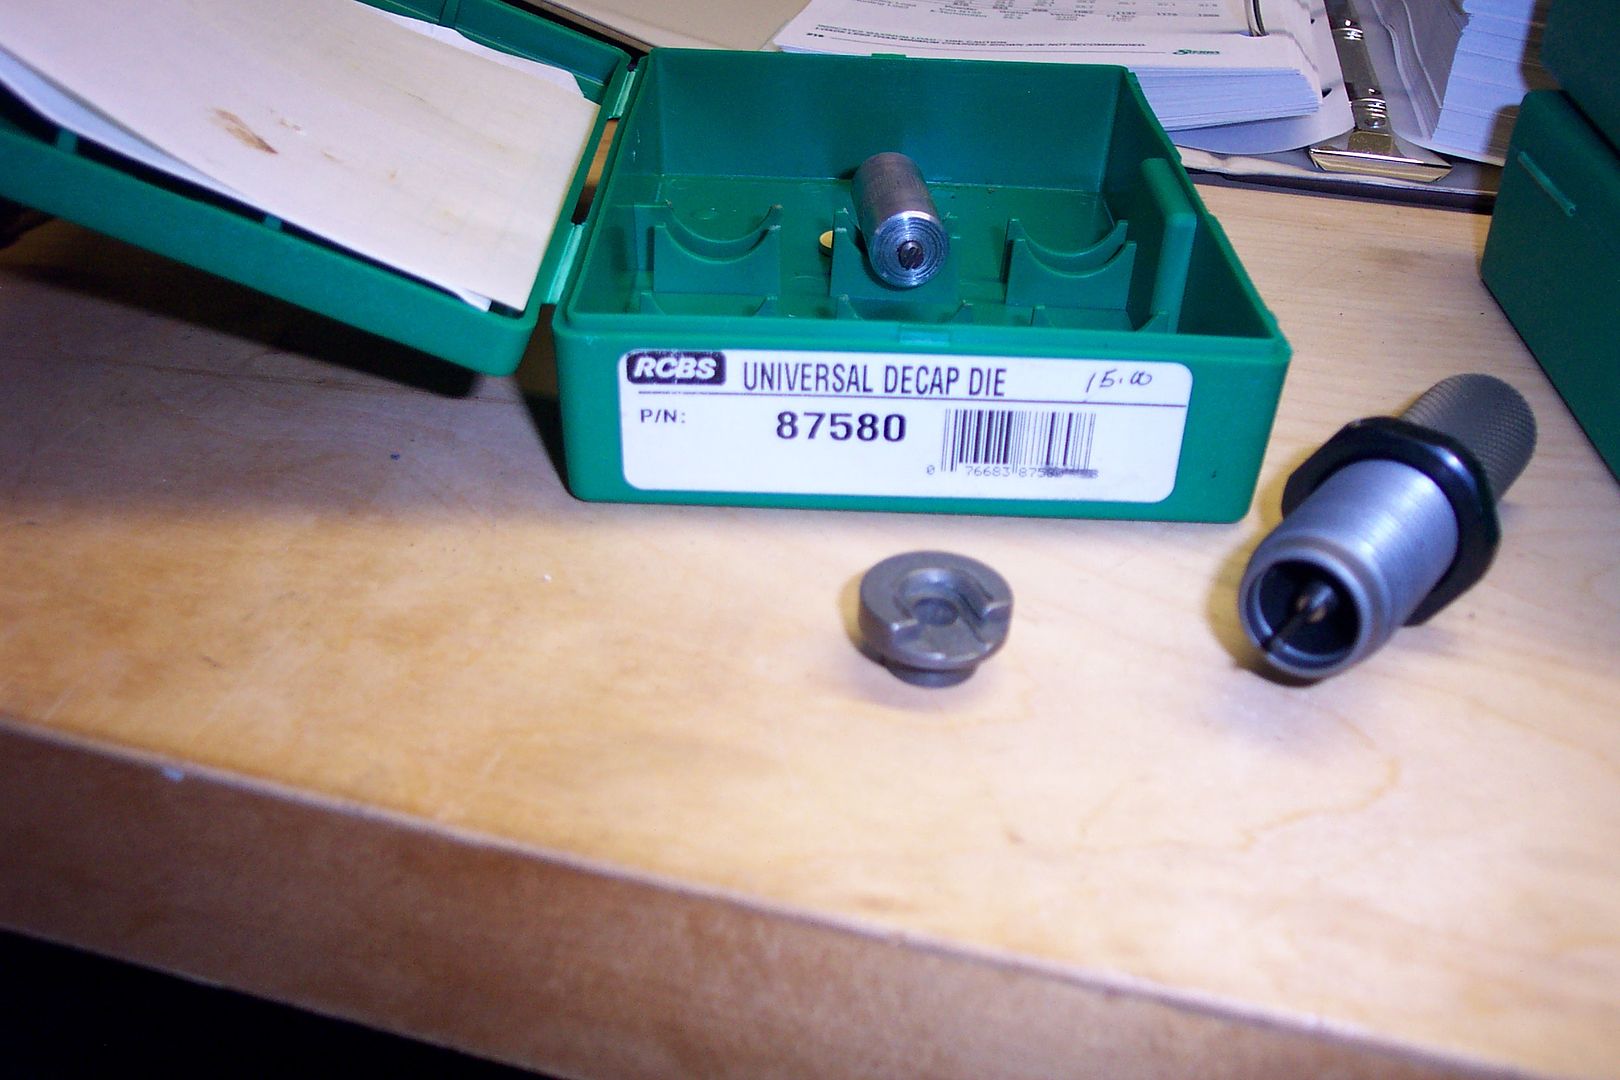 Above is the decapping die with the proper sized shell holder. The base of the cartridge fits in the holder and the pin ( a replaceable part ) pushes out the used/spent primer. 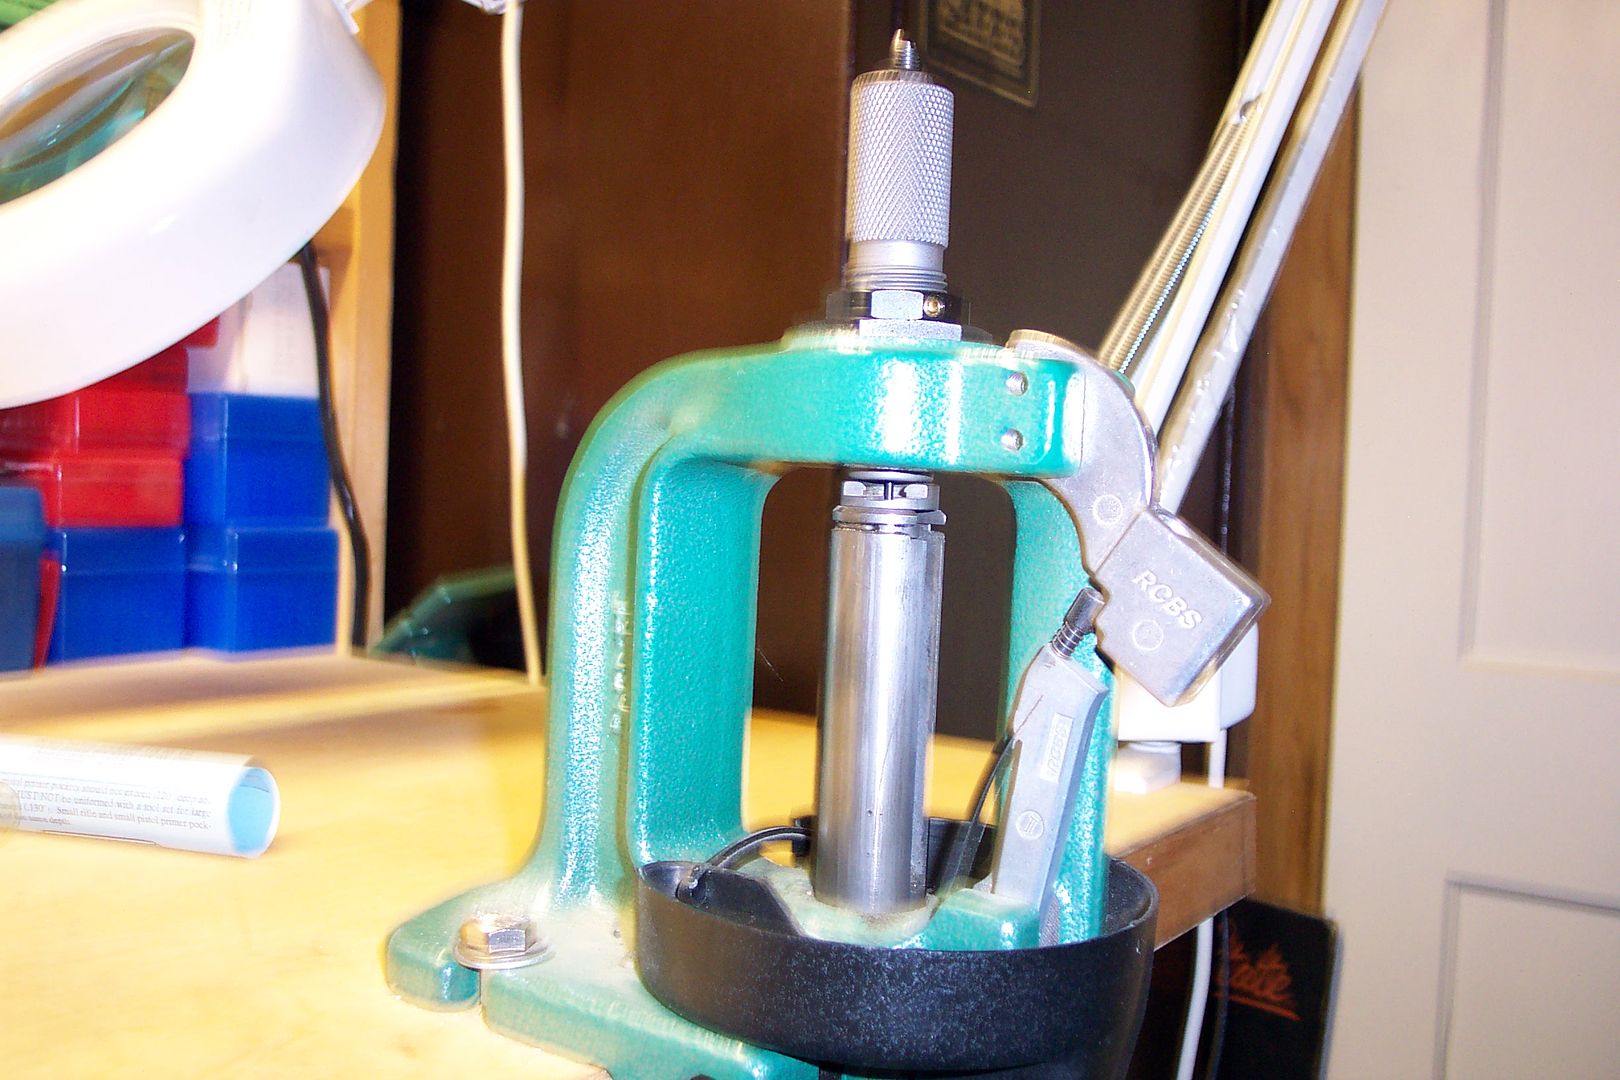 As with all dies, set the bottom of the die so it almost touches the shell holder. Leave about .020 clearance ( the thickness of a paper match pack ) 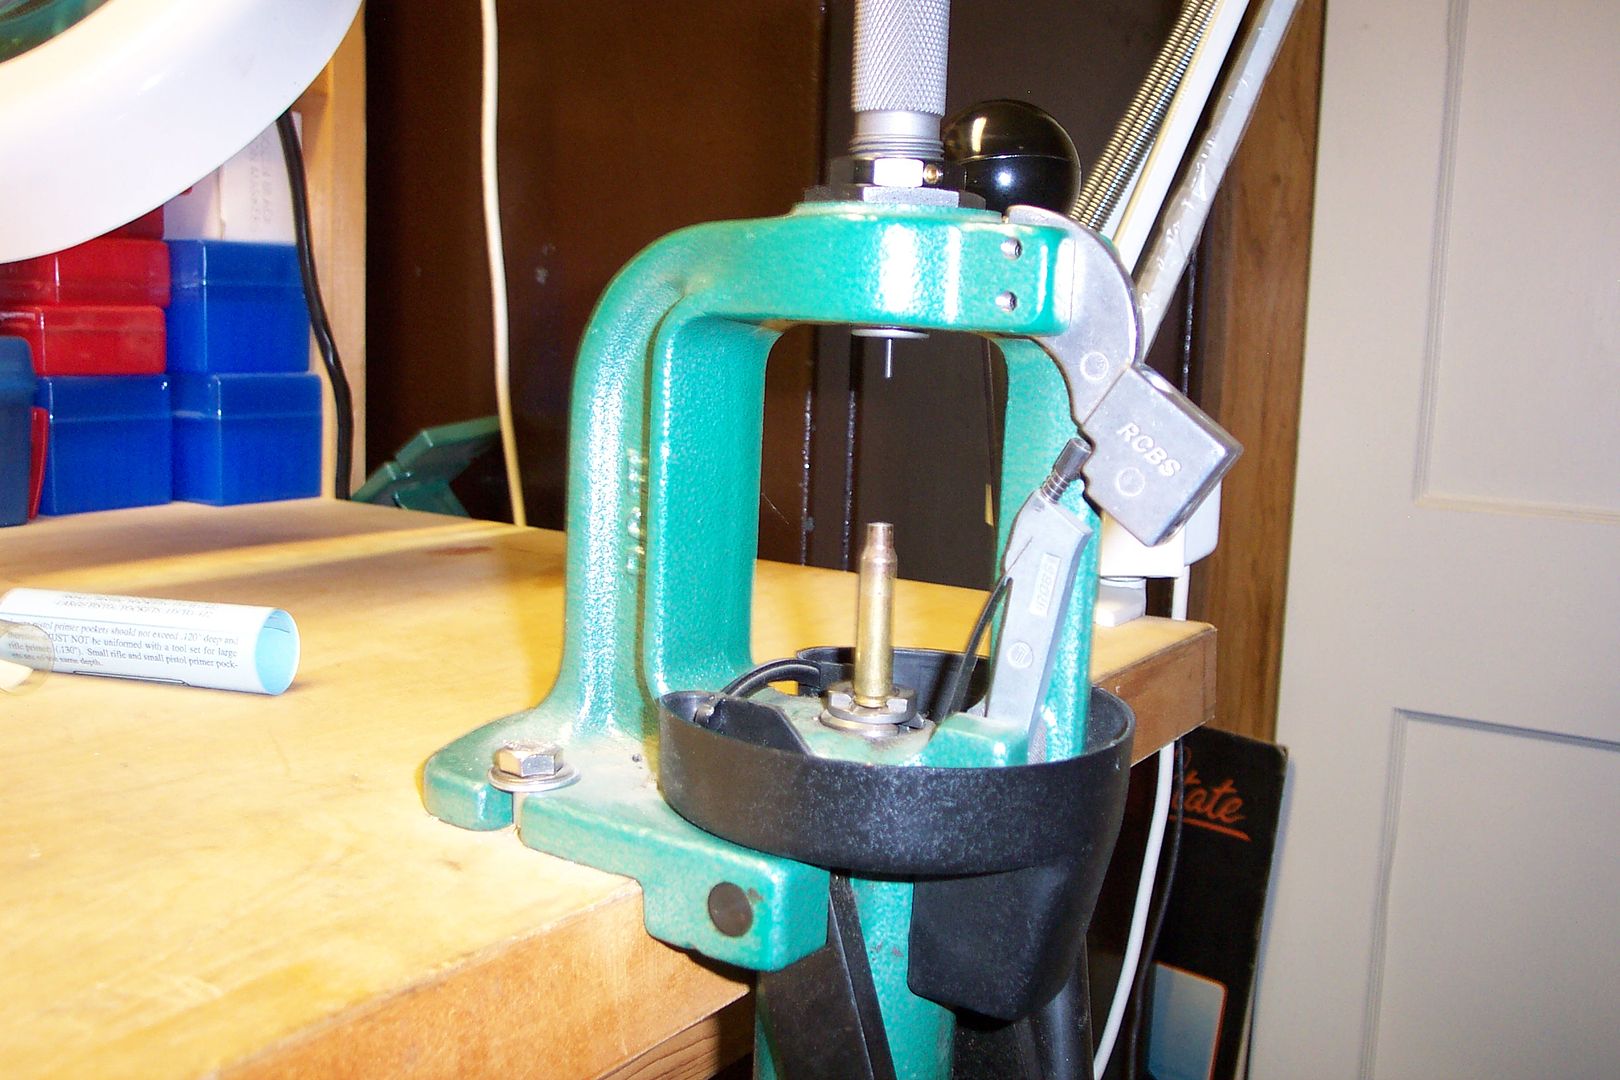 The spent case goes in the holder, the handle is pulled and the pin pushes out the spent primer. Repeat many times. 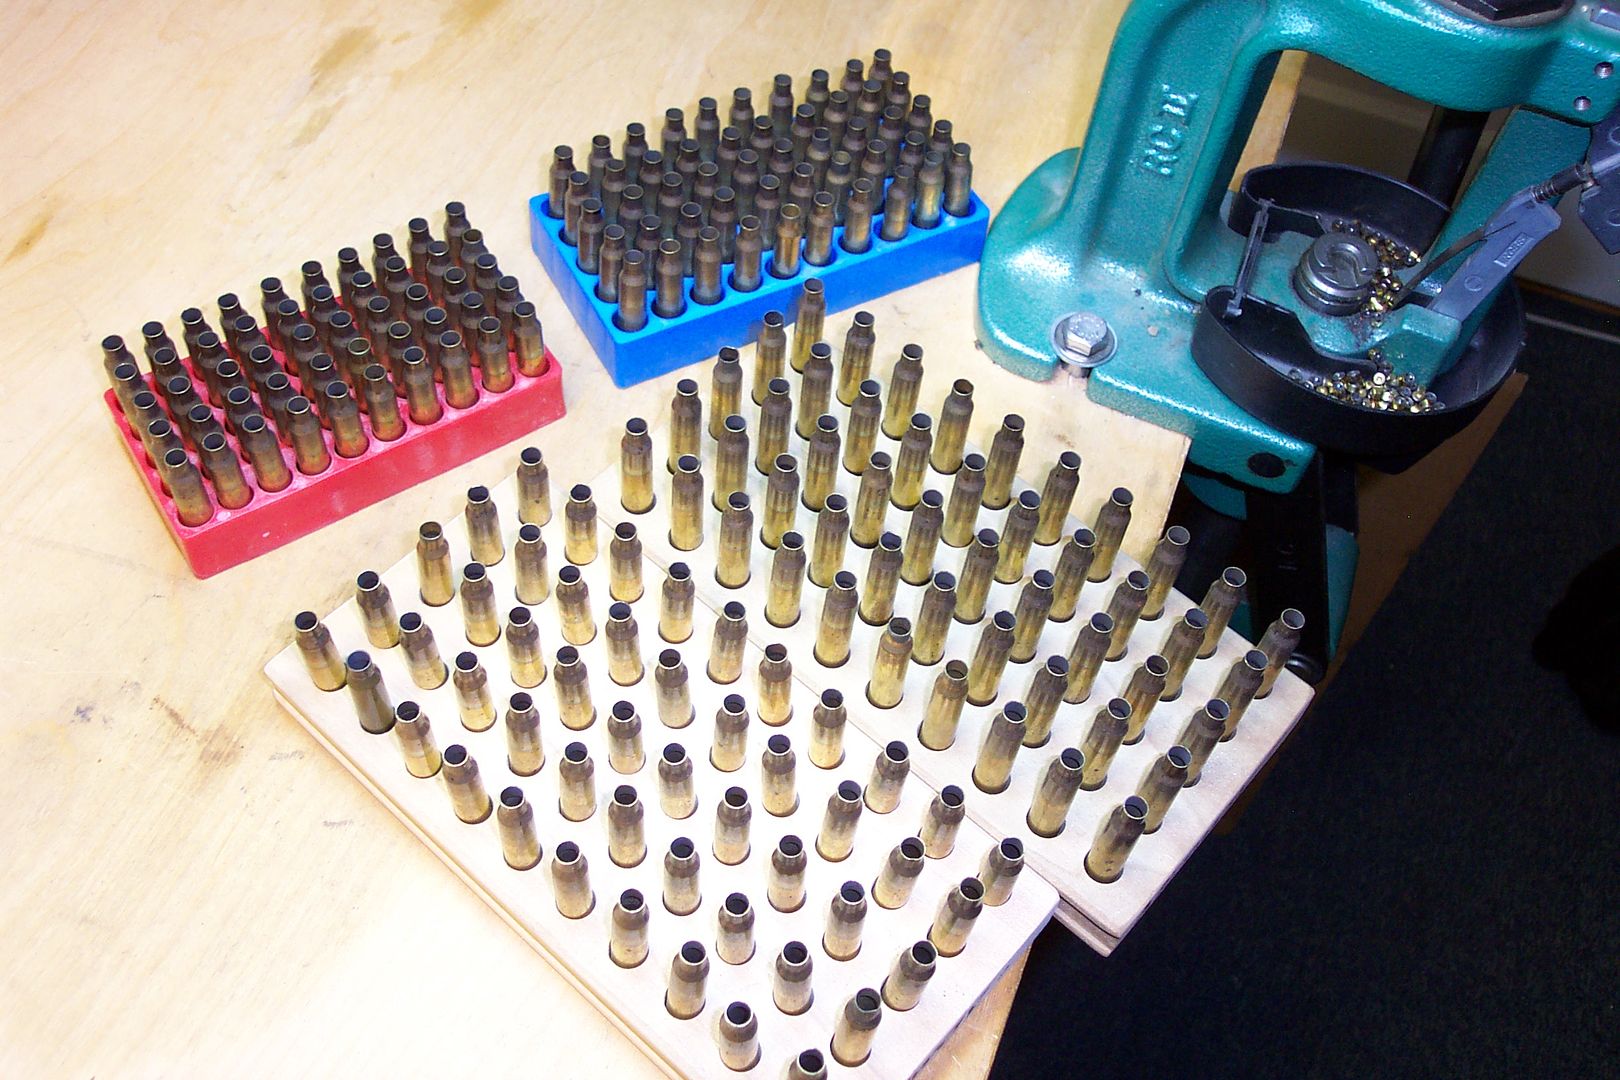 Now I have 200 cases that have the primers removed. They have NOT been resized yet.  Into the vibratory tumbler 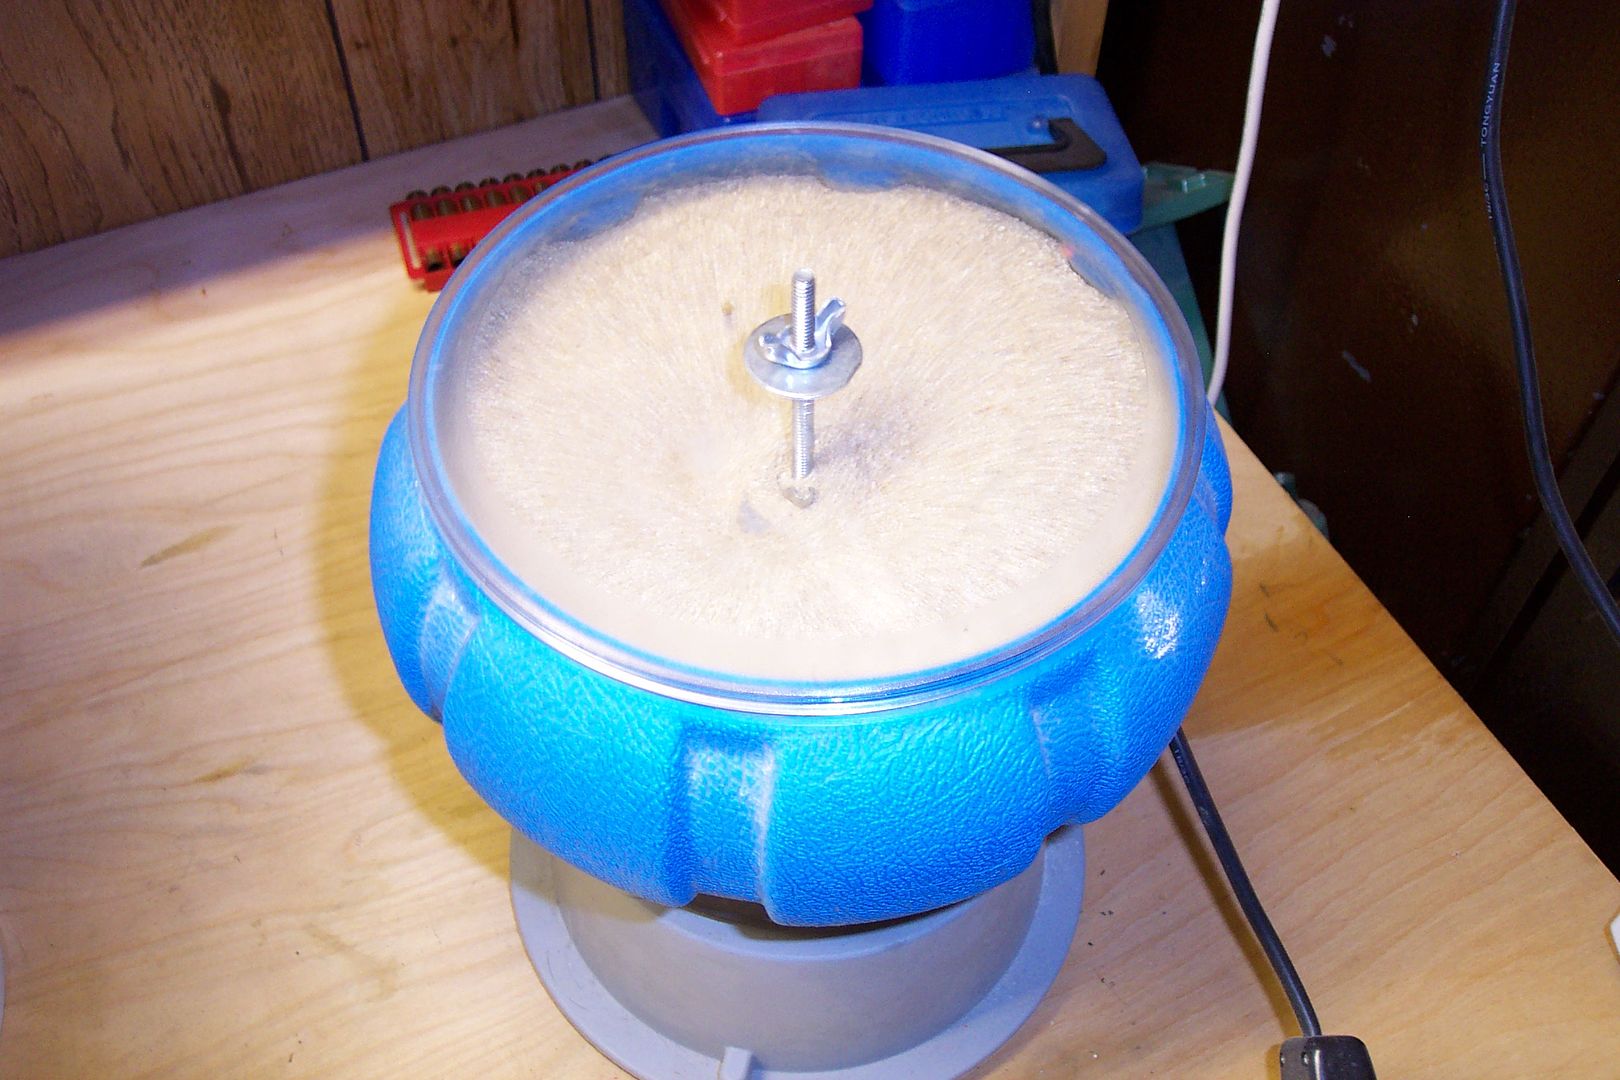 add corncob media and turn on for one to one and a half hours. The basket shakes back and forth and it "scrubs" the brass clean. You can see the parts move in circle from the outside of the basket to the inside on a never ending ride. 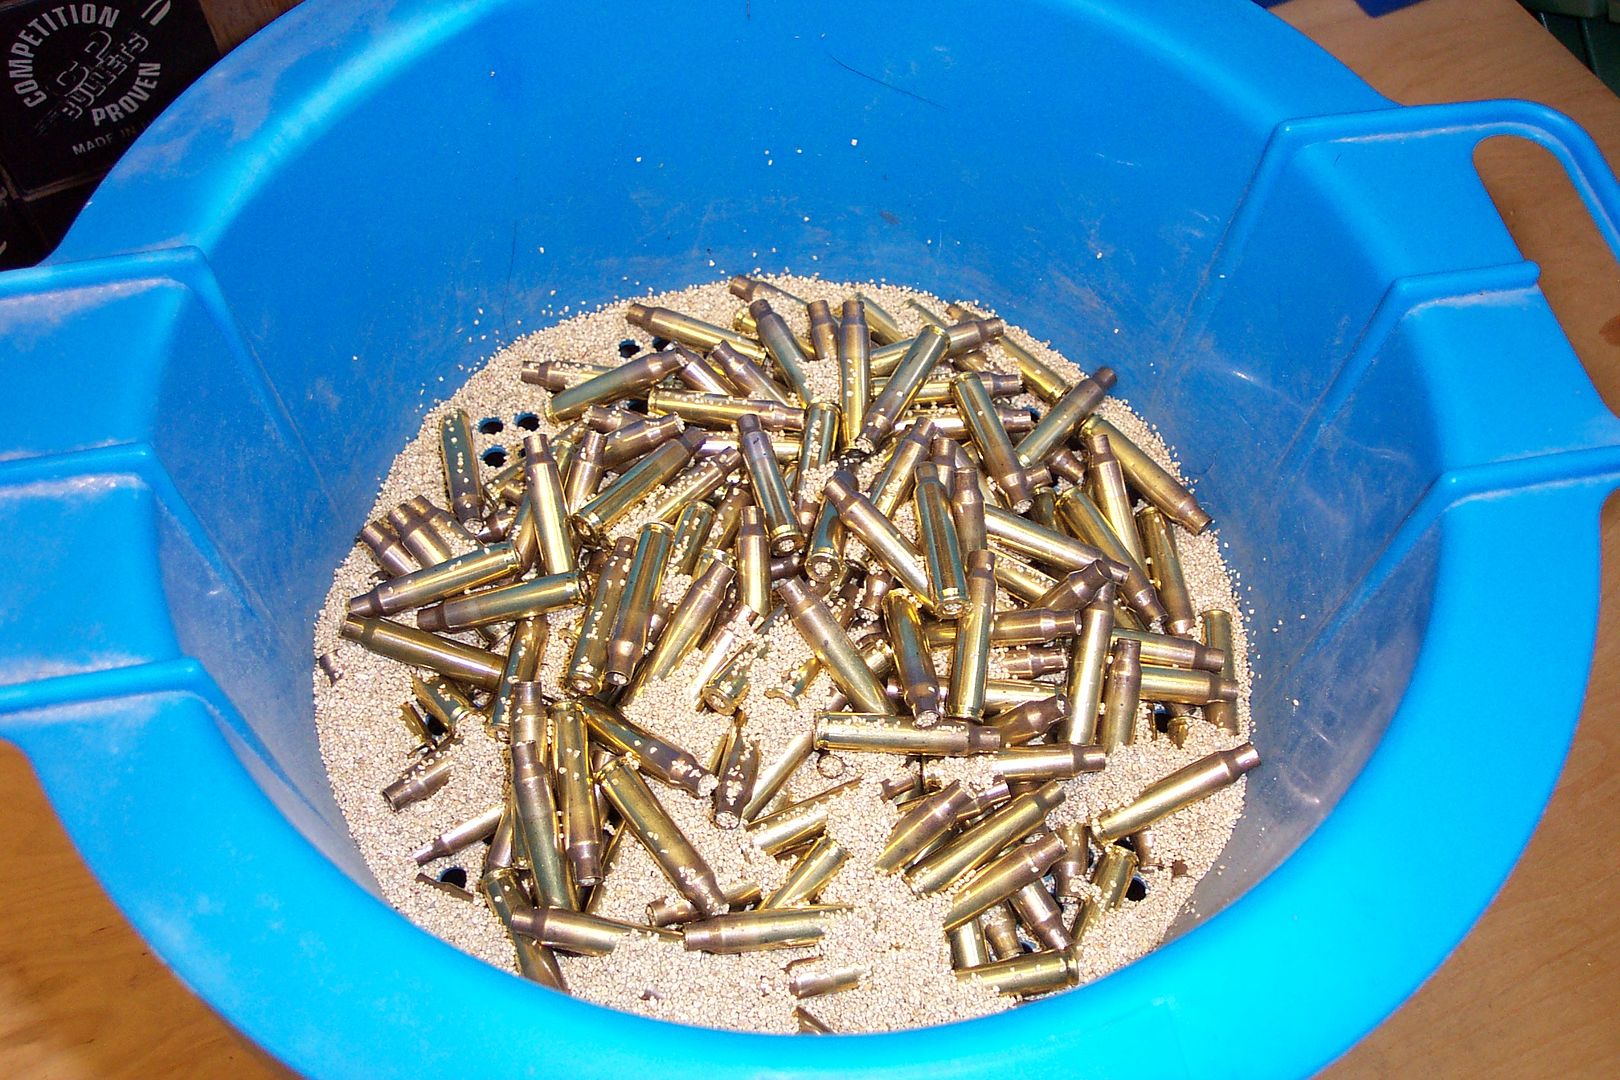 Into the strainer and shake. Move the brass around trying to get all the media out. 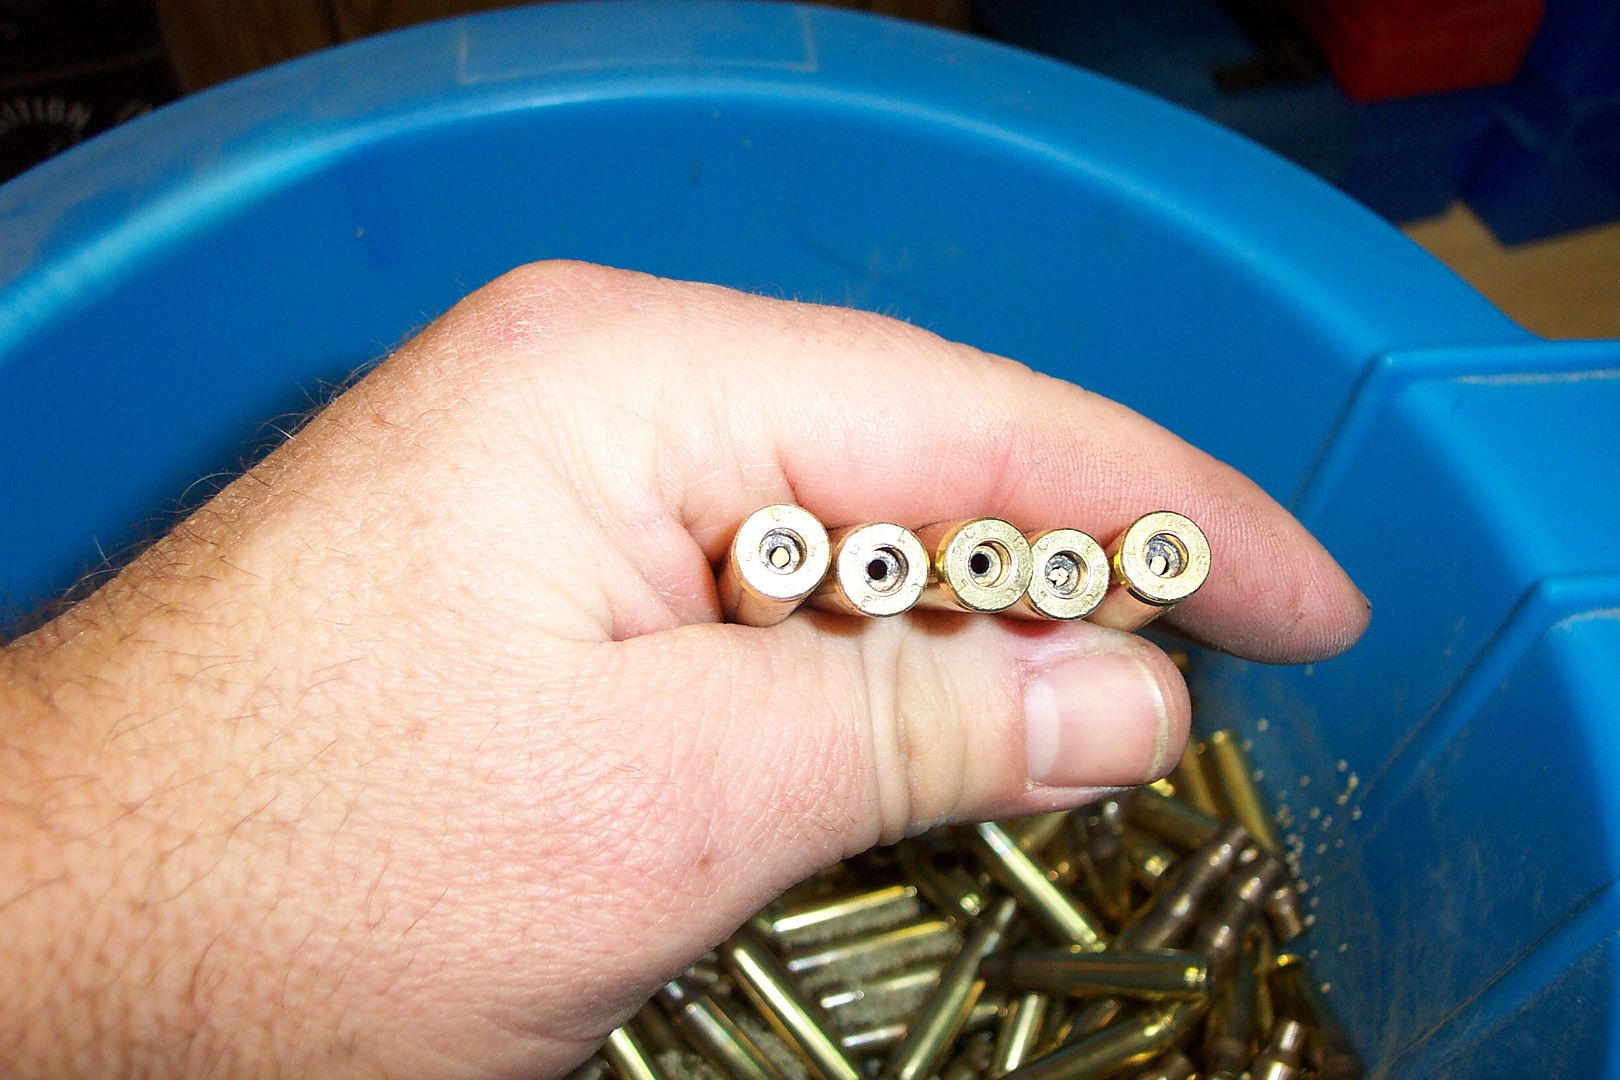 The media gets into the flash hole. Take a small wire and knock out the media as you dump the media in the case back in the bucket. 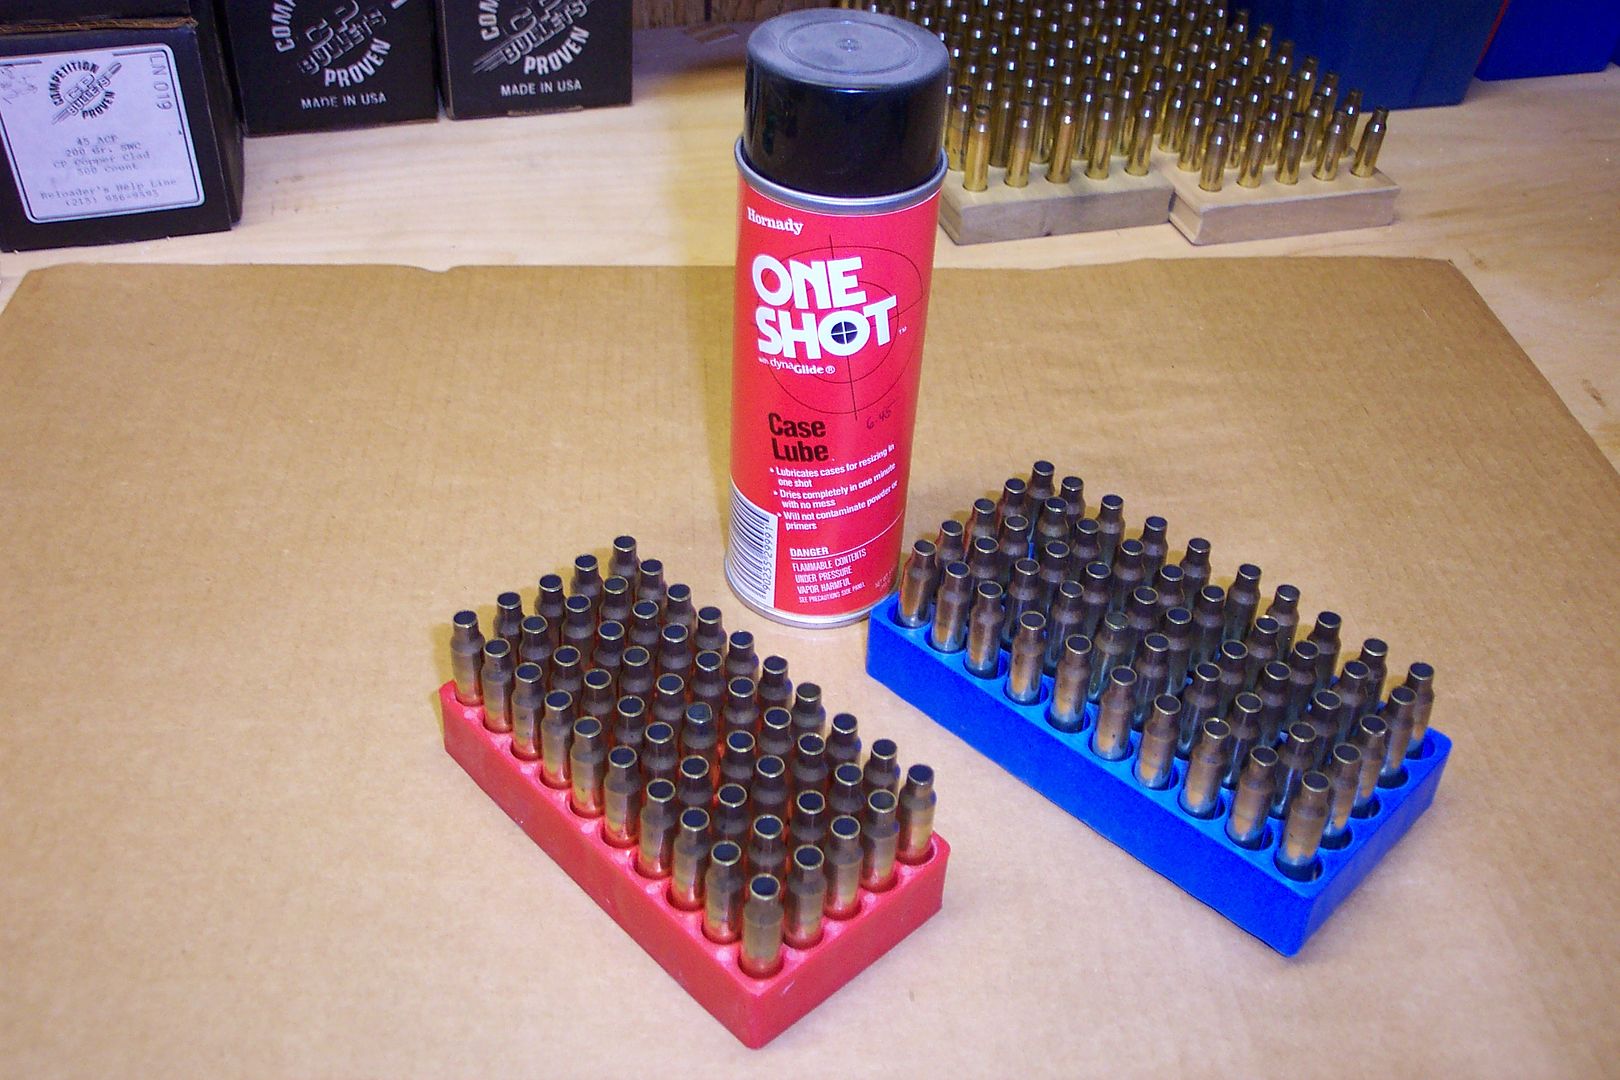 Place all the brass in trays to hold them upright and spray them with a lubricant. I like the Hornady One Shot as it doesn't leave a heavy film on the brass. ALL bottle neck cases must be lubed before resizing or they will get stuck in the resizing die. Using the resizing die, ( same pic as earlier but different die) place the lubed brass in the shell holder and firmly press the handle down. Then in a smooth action, lift the handle back up. ( if you don't have a decapping die, use this as your first step ) What you have just done is run an expander in the cartridge neck and as you bottomed out the stroke, made the case the correct size to use again. The pin would also push out the spent primer if now done earlier However, the neck is too small now . When you move the handle back up, the expander makes the neck the correct size. :thumbs: Wipe off resizing lube. 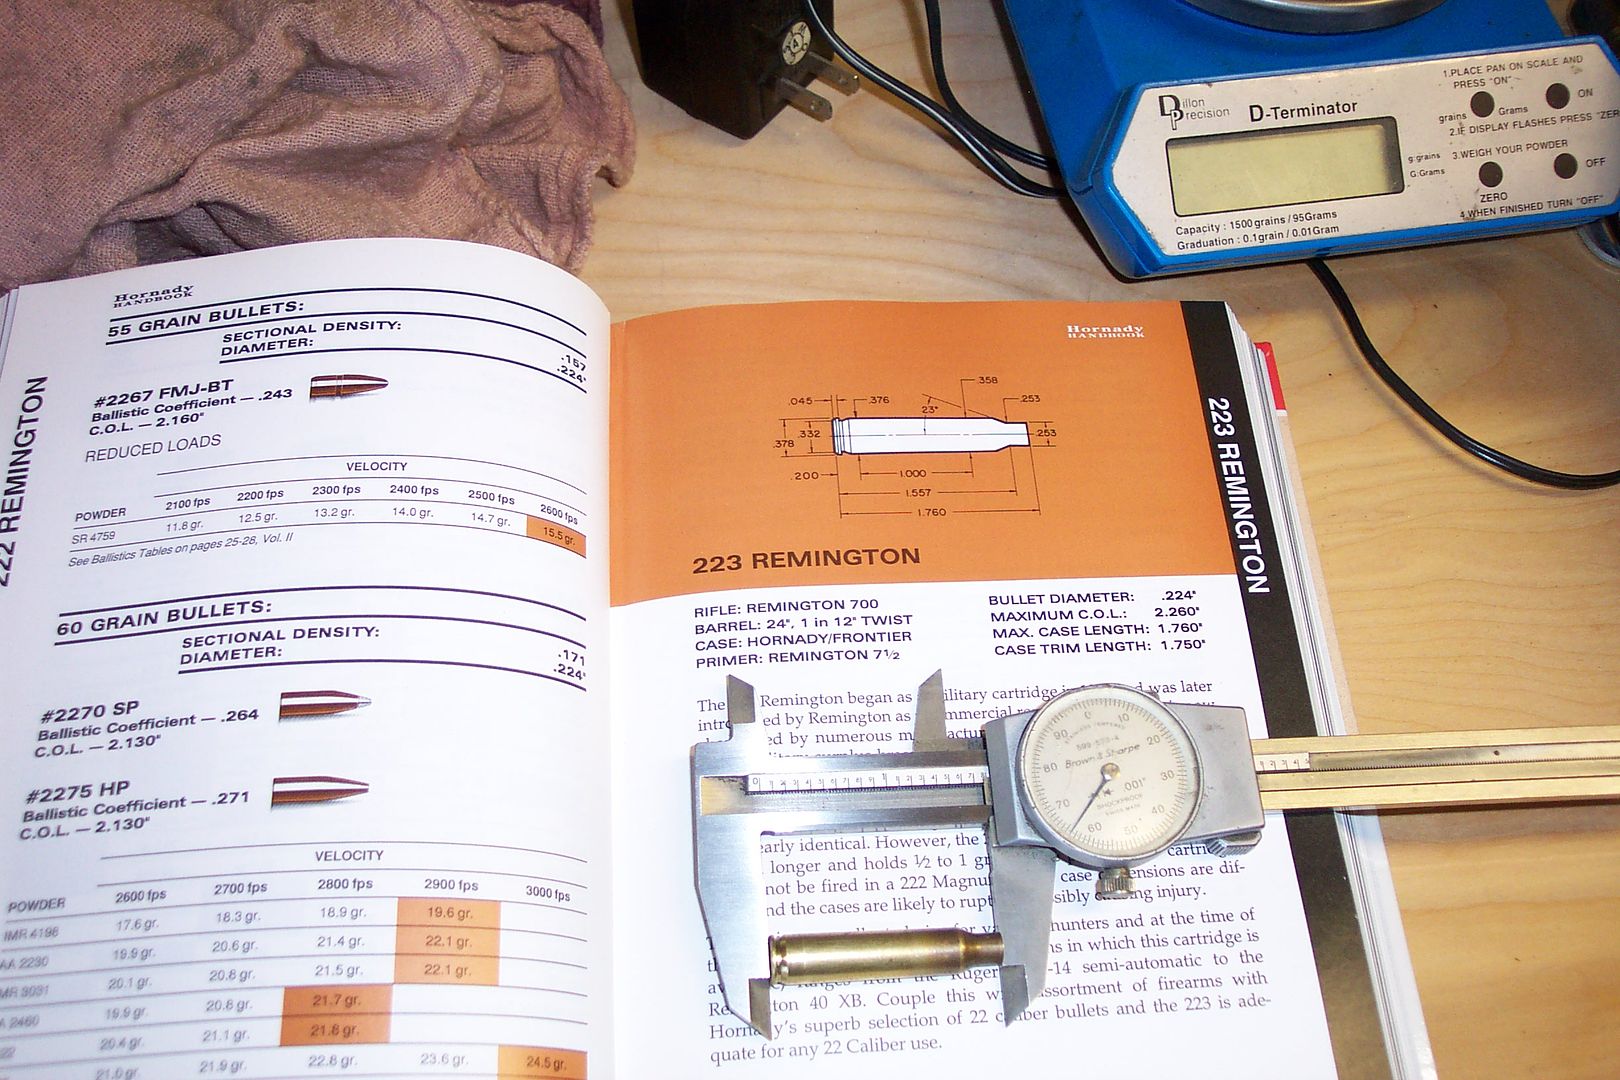 Now we measure our brass for overall length. The .223 brass has a maximum length of 1.760 but this brass is 1.765. Since it's oversize, it must be cut. 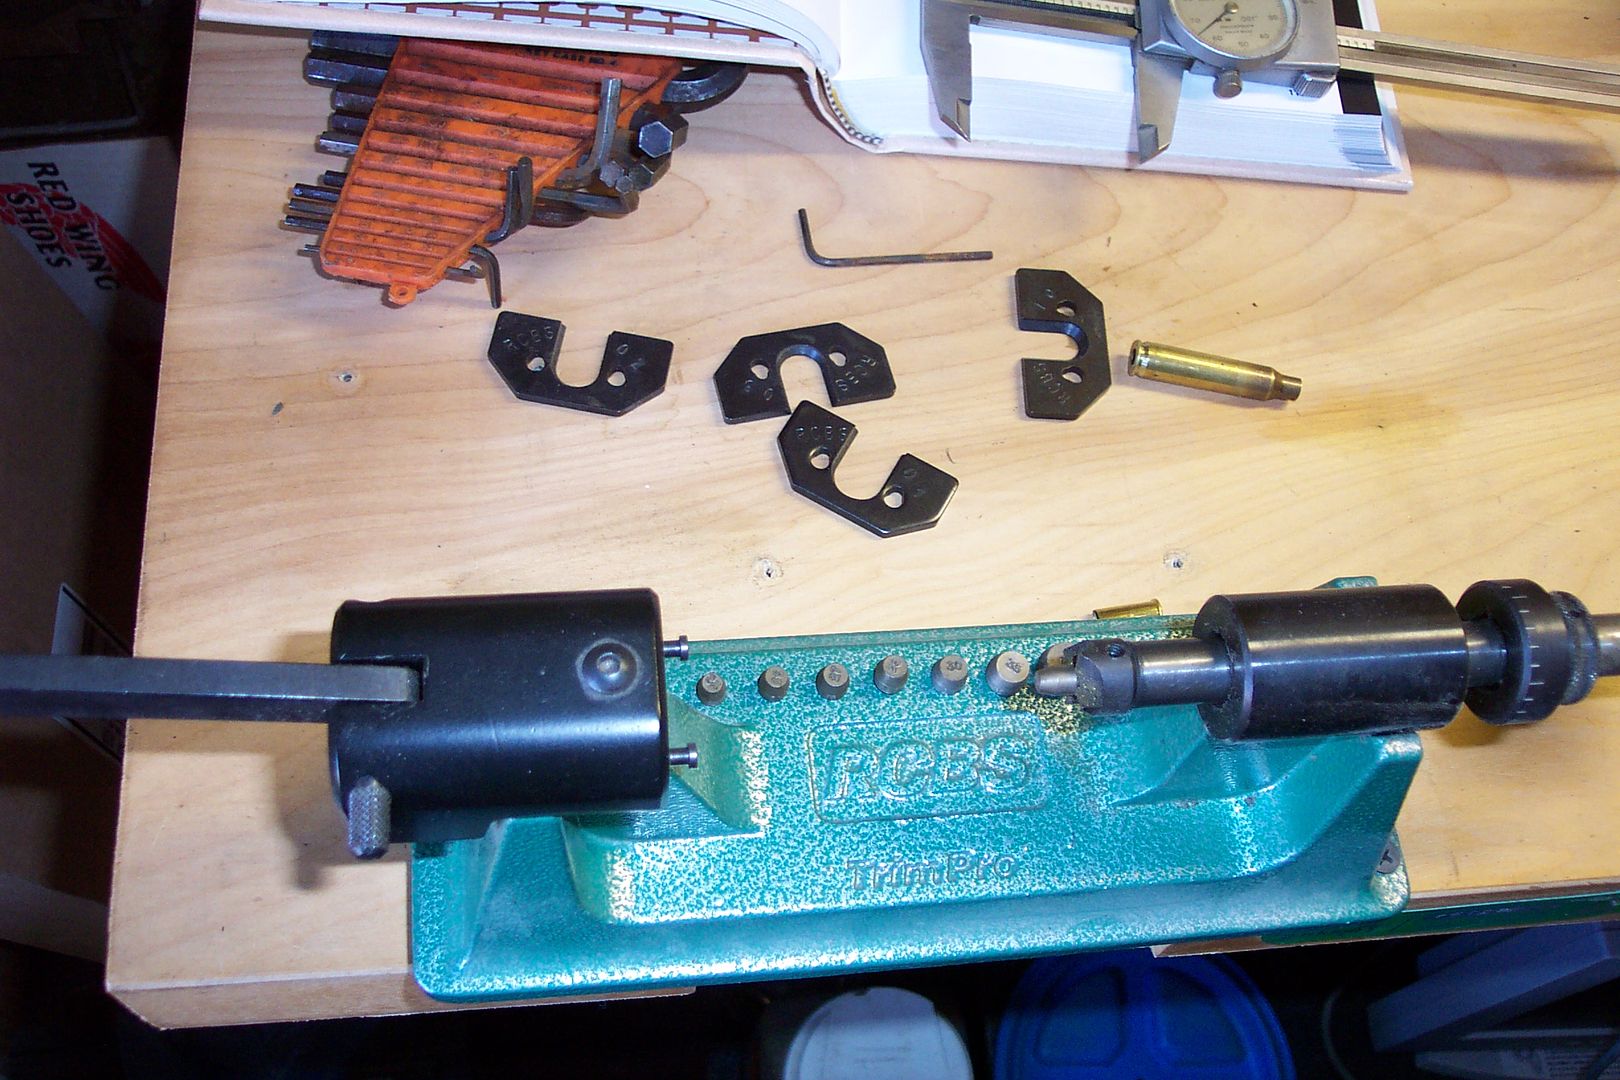 This is a case trimmer. One of the four plates hold the case, the pilot fits in the neck and the cutter cuts it. The black collar on the outside is the coarse adjustment and the collar next to it is the fine adjustment. 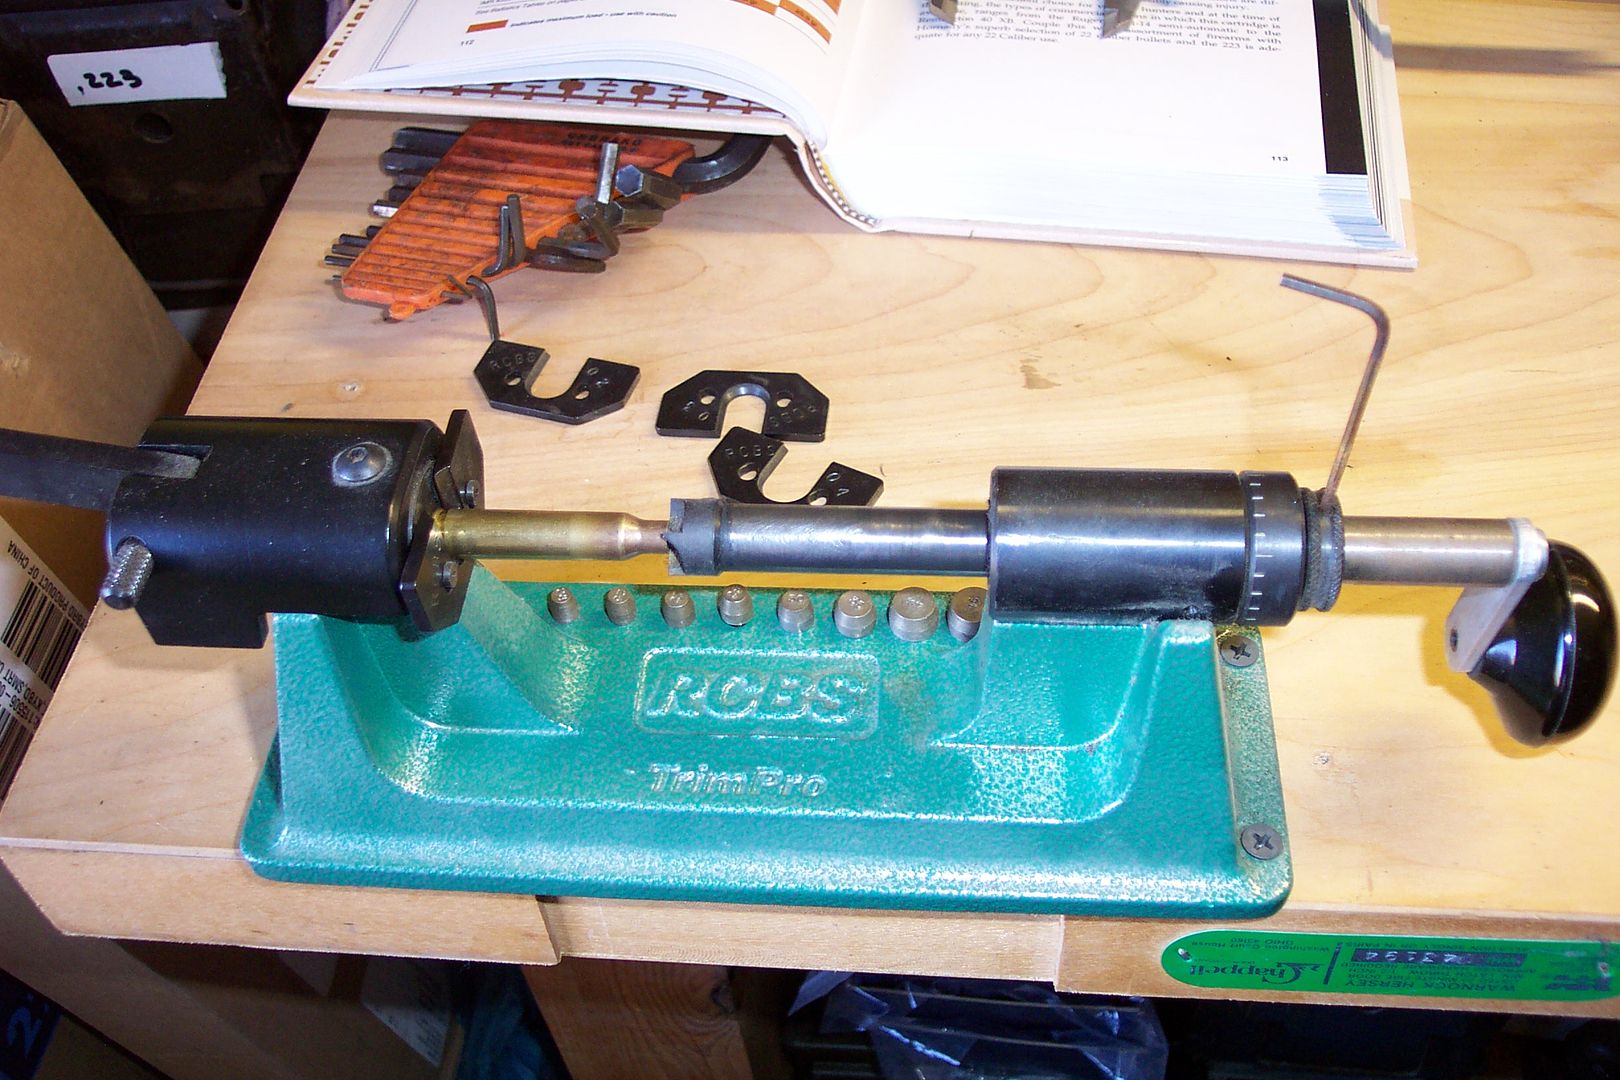 I've picked the correct size for the case and placed that on the left side pins. By pushing the handle down, you place the case in. I used the allen wrench to put in a .22 cal pilot and brought it against the case. Where the allen wrench is the coarse adjustment. I gently tightened it and turned the fine adjustment 5 lines for .005 of movement. I took a cut and found I needed to move it another .005 so I did that. Once you're set, just check about every 10 pieces to make sure you are correct. 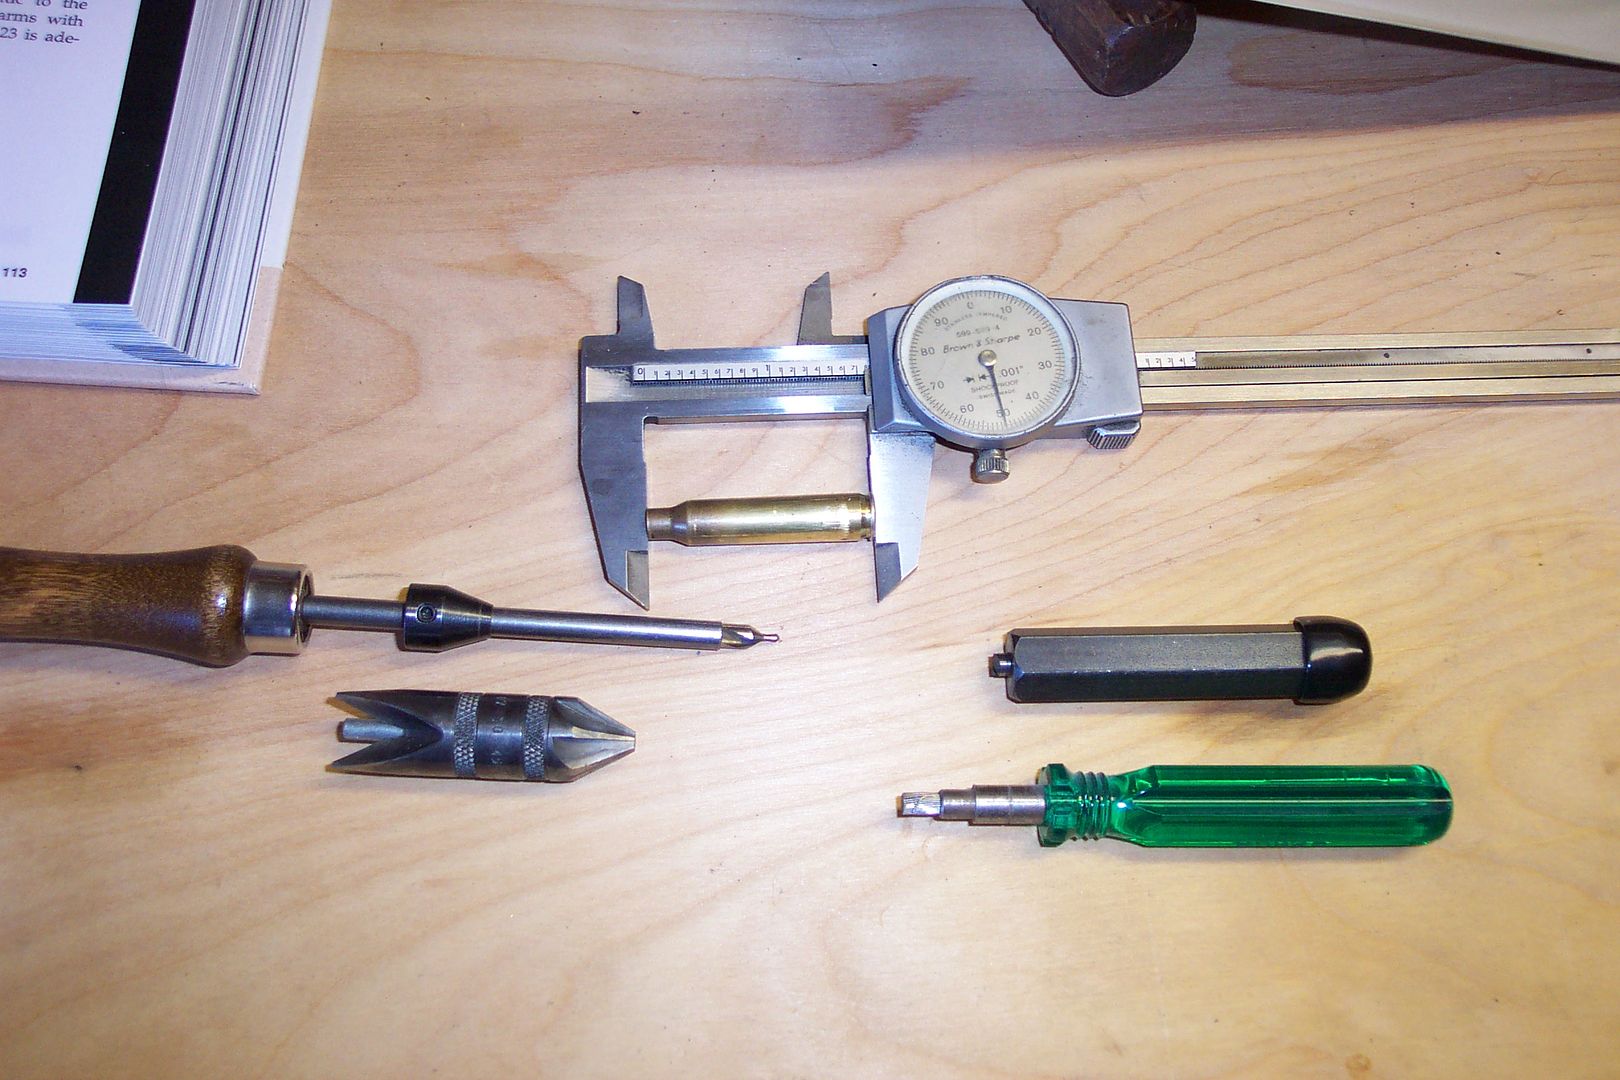 Now I have the correct cut length of 1.750 ( that info is in the reloading manuals ).I will be using three of the tools shown on each piece of brass. The chamfer tool is used on the neck you just cut to remove the burr on both the inside and outside. Hold the cutter in your fingers of one hand and the brass in the other. Turn opposite directions to remove the burr. The wire brush is used to clean the burned residue from the primer pocket. However, I use the cutter to make all my primer pockets the same diameter and depth. The wooden handled tool is used to remove any burrs from the inside of the case at the primer flash hole. NOTICE NOW is the time you look at your brass for cracks in the neck, bad dents or other bad looking things. If in doubt, throw it out 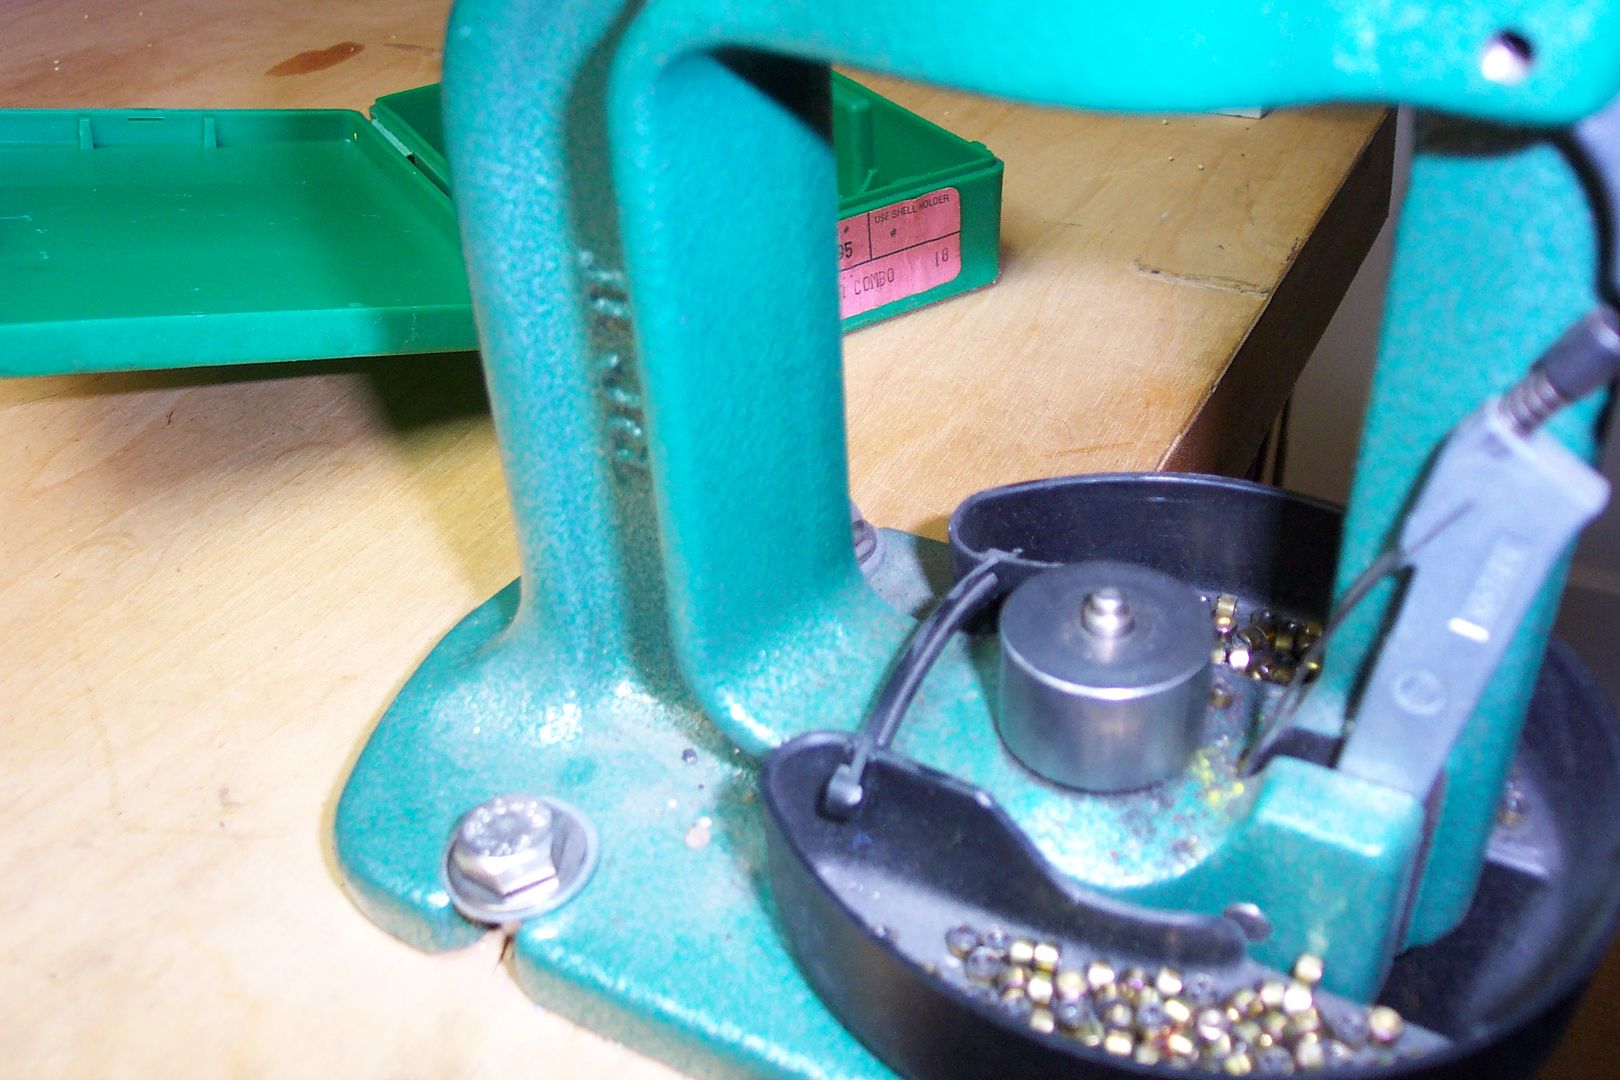 If you have military brass and you did NOT cut the primer pockets, you will have to swage the primer pocket so you can get a primer in. The correct size swagging button is put in place of the shell holder ( either large or small primer pocket ), the cap is placed and it's run against the stop in the upper die. When the handle is brought back the the start position, you have the correct sized primer pocket. Now it's time to prime the cases. Go wash your hands with soap and water. Yes, I am completely serious. Oil is about the only thing that will kill primers ( not make them go BANG ) 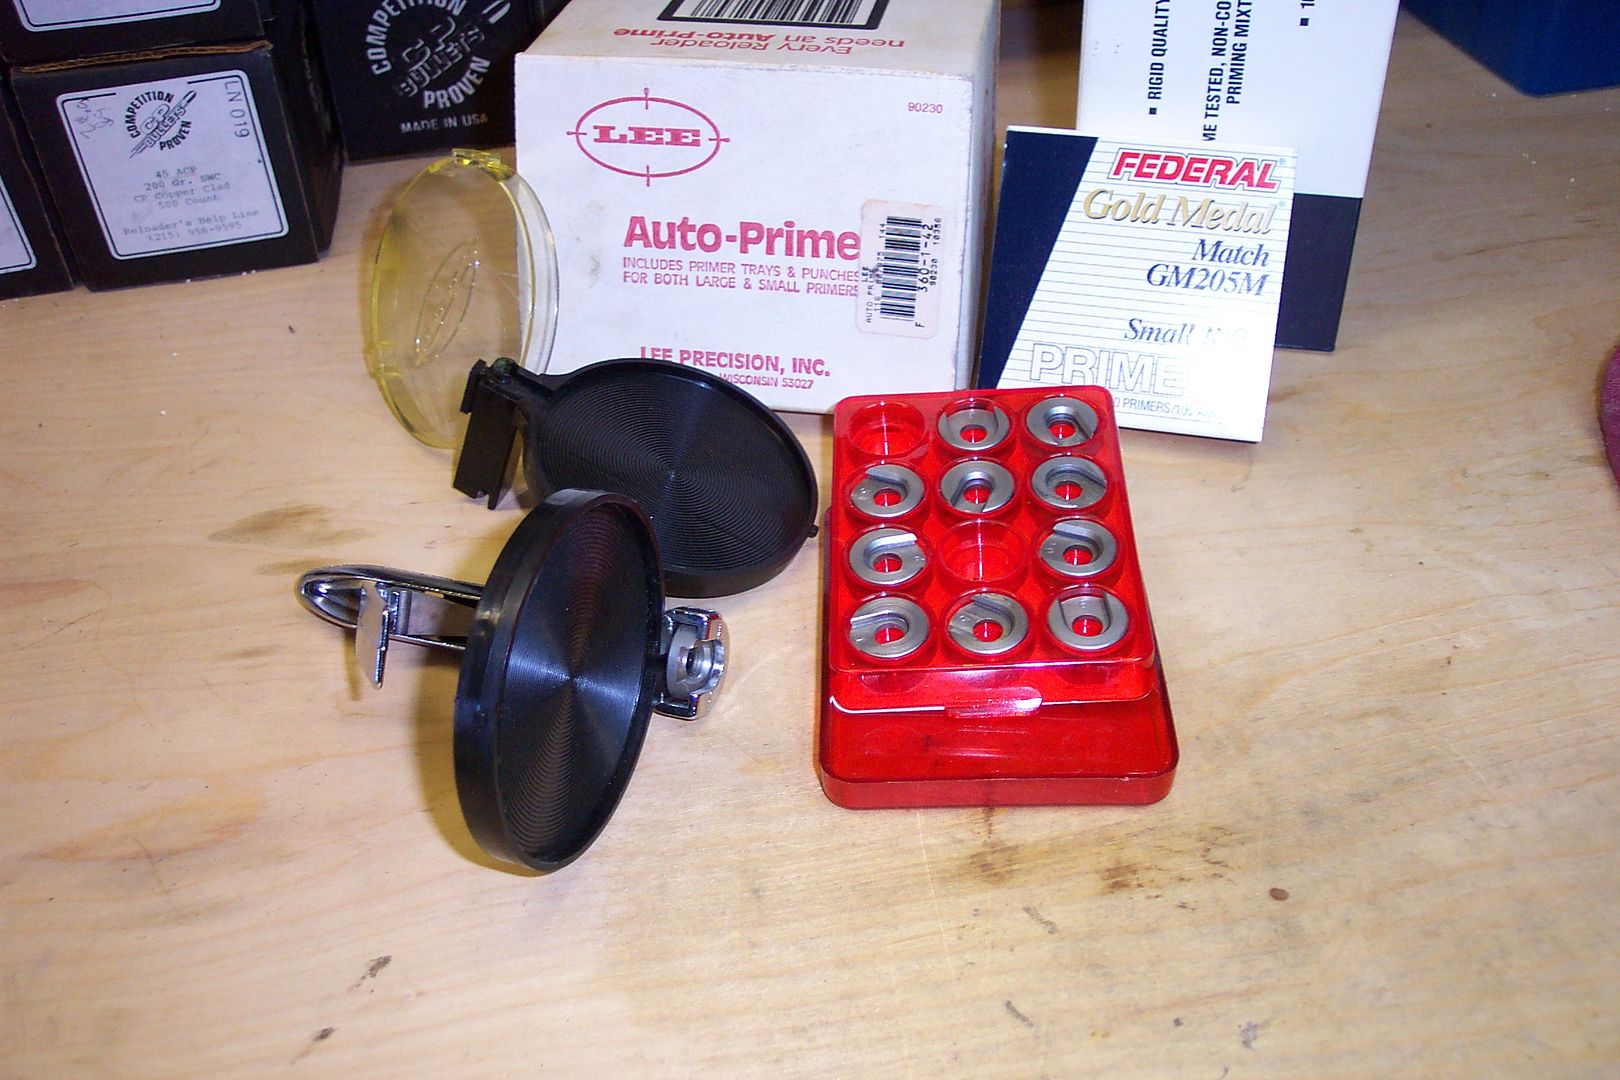 I have a Lee hand Auto Primer. It has trays for both small and large primers. NOTE--- Pistol and rifle primers are NOT interchangeable. Different burn rates, metal hardnesses and heights. Also, if you don't wear eyeglasses, put on safety glasses. |

|

|
| Bookmarks |
|
|


 Threaded Mode